"There is nothing -- absolutely nothing -- half so much worth doing as simply messing about in boats." Wind In The Willows by Kenneth Grahame
I have done modifications and additions to every one of the 9 boats that I have owned. Some modifications were as simple as making a label. I have also done the extensive modifications to make the boat more comfortable or added a feature that was not included in the manufacture. We have owned three Ranger Tugs and you can learn about the Ranger 25 we had for 6 years by CLICKING HERE (www.laurieann-ranger25.com). I also did modifications to the Ranger 29 we used to live on and travel the Great Loop for nearly year. See those modifications by CLICKING HERE (www.andiamo-ranger29.com).
These are a sampling of the modifications that was done to Trilogy, our Ranger 27. Ranger Tugs makes a great platform. We use that as a starting place to tweak the boat to our needs and tastes.
These are a sampling of the modifications that was done to Trilogy, our Ranger 27. Ranger Tugs makes a great platform. We use that as a starting place to tweak the boat to our needs and tastes.
Galley
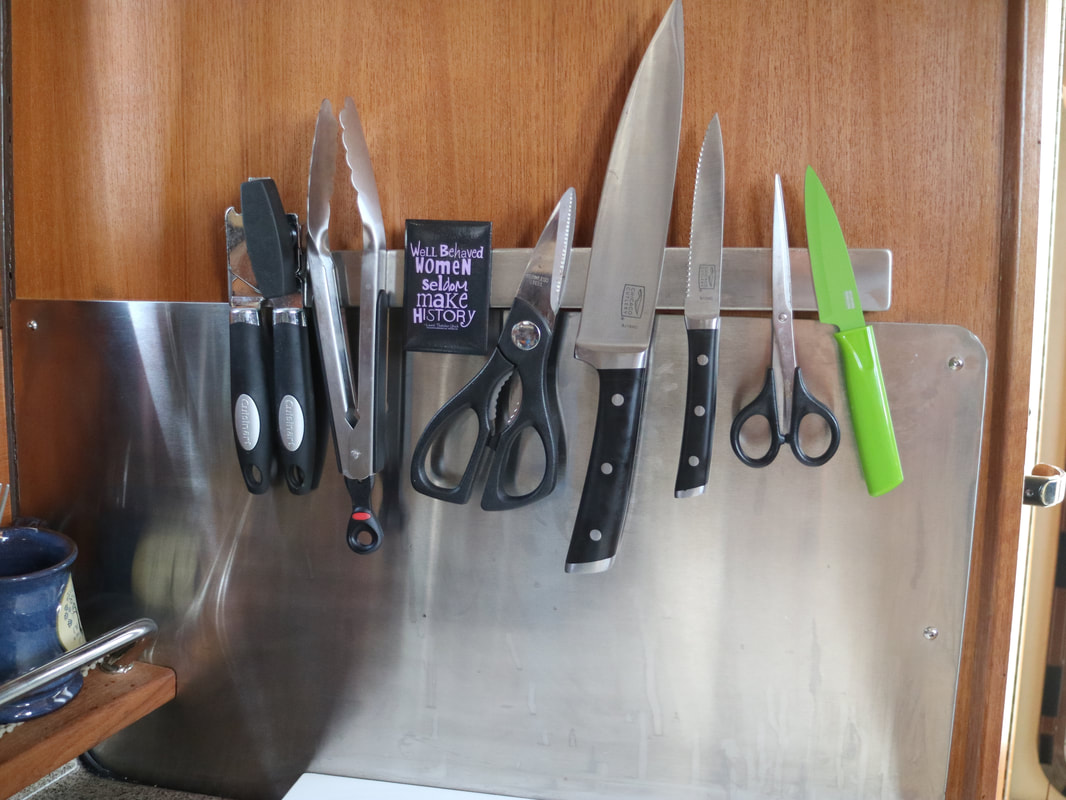
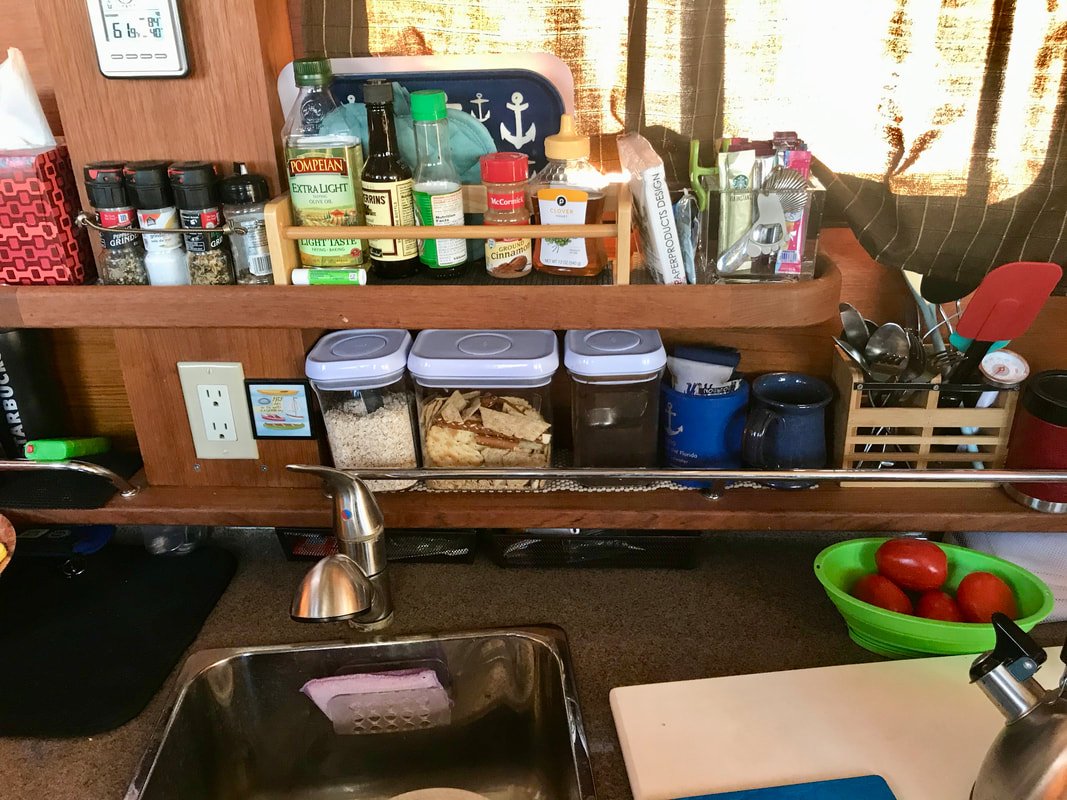
Most of the modifications were done in this space. We use this space a lot because we eat-in way more than using a restaurant. Most of the modifications were about creating the opportunity for more space and organization. Top Row of photos below: Left - Plates and bowls were chosen for right size of the meals we eat, they nest together, and ease of cleaning. A battery operated light & switch was added inside each cabinet. Middle - A magnetic knife rack from Ikea holds of these even while trailering and during the roughest water. Right - The shelves of the tug were not changed but were added to with smaller racks and air tight containers from OXO. The white cover in the lower right photo is a custom cover on the stove that creates more counter space.
Most of the modifications were done in this space. We use this space a lot because we eat-in way more than using a restaurant. Most of the modifications were about creating the opportunity for more space and organization. Top Row of photos below: Left - Plates and bowls were chosen for right size of the meals we eat, they nest together, and ease of cleaning. A battery operated light & switch was added inside each cabinet. Middle - A magnetic knife rack from Ikea holds of these even while trailering and during the roughest water. Right - The shelves of the tug were not changed but were added to with smaller racks and air tight containers from OXO. The white cover in the lower right photo is a custom cover on the stove that creates more counter space.


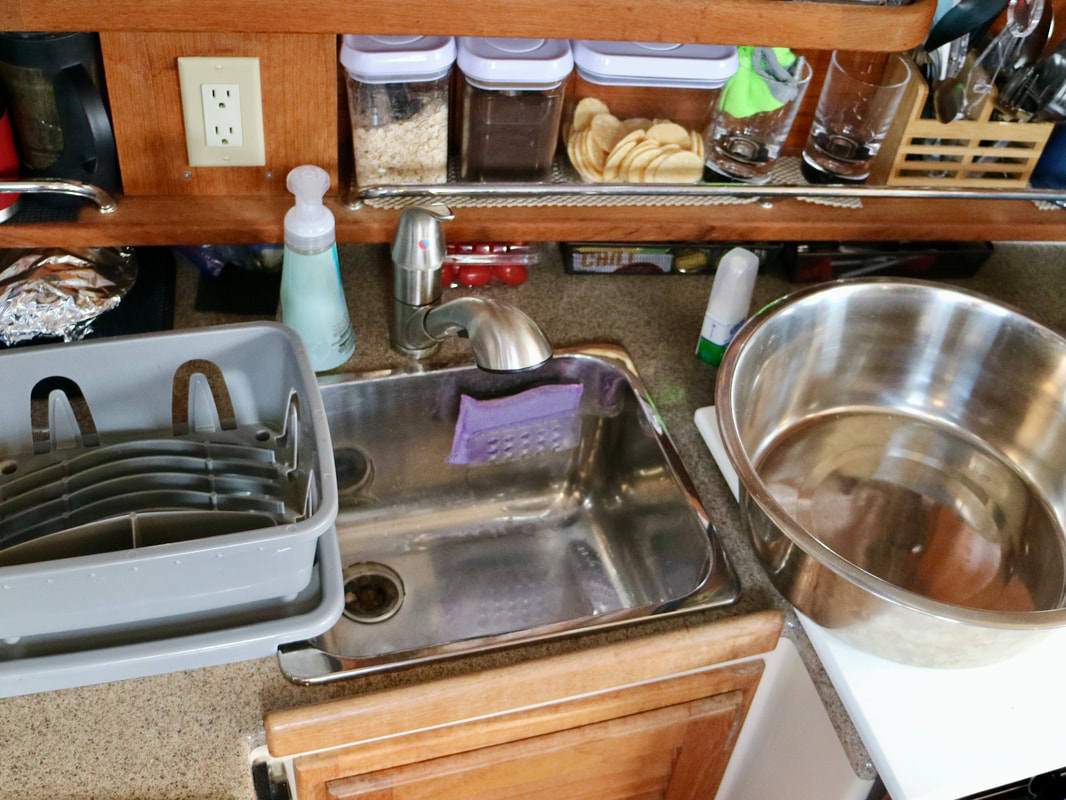
Row of photos above: Left - This cabinet was deeper than that the door. A false floor was added using Starboard or King Board that contains rarely used food. Clear plastic bins are used to organize the cabinets. Middle - A switch that controls the water pump was added near the sink. We prefer to not leave the water system pressurized and this switch allows control of the pump without the need to go to the breaker panel at the helm seat. Right - No one talks about how dishes are washed. With limited space and one sink, creativity is needed. Dishes are washed in the big bowl on the right. The bowl was found at a farm supply store as a water bowl for big dogs. Rinsing occurs in the sink and the dishes dry in a rack that was found at Camping World.
The Head
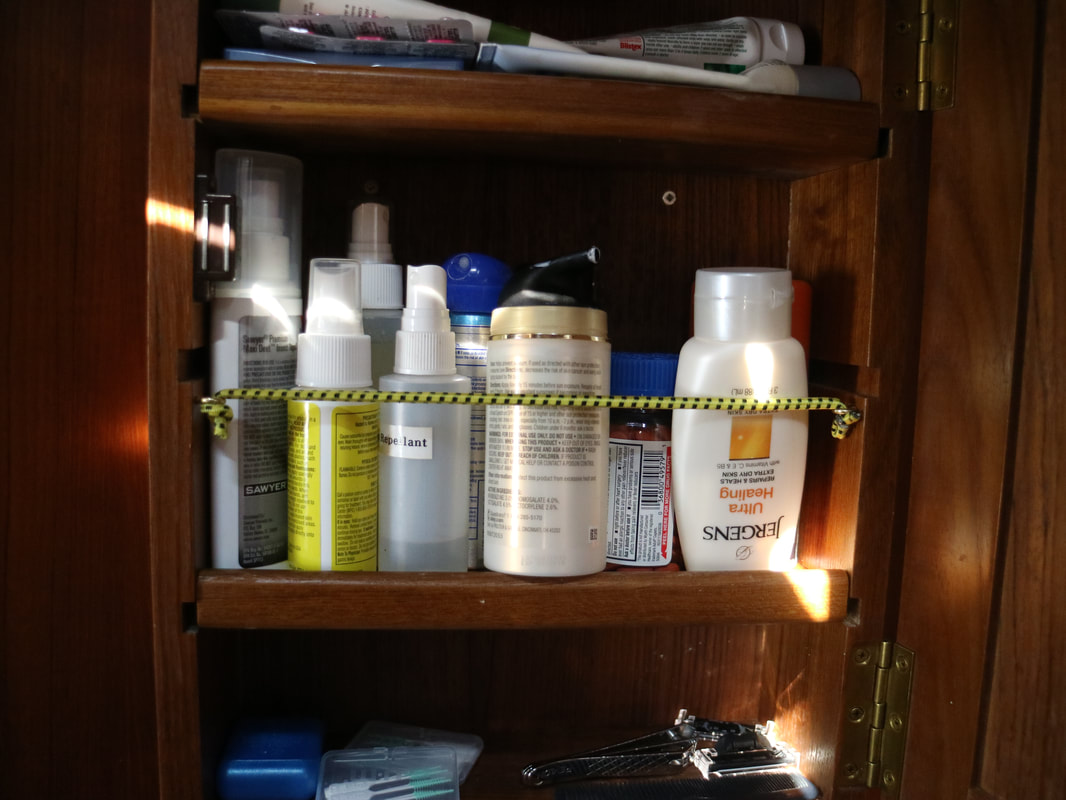
The cabinet behind the mirror will spill the contents when the door was opened. The photo on the left shows A short and thin shock/stretch cord found at Harbor Freight with two eye screws did the trick. The photo on the right shows the changes to the shower sump pump. We use the shower a lot and rarely use other facilities when cruising. It is that good. When the float switch in the pump box that is under the floor failed. It was replaced with this manual switch and is more reliable.
The cabinet behind the mirror will spill the contents when the door was opened. The photo on the left shows A short and thin shock/stretch cord found at Harbor Freight with two eye screws did the trick. The photo on the right shows the changes to the shower sump pump. We use the shower a lot and rarely use other facilities when cruising. It is that good. When the float switch in the pump box that is under the floor failed. It was replaced with this manual switch and is more reliable.

The Interior.
Photos Below, Top Left - Ranger Tug put a lot of hatches in the roof. All the light creates an open and airy feeling but it also creates heat and glare. We have covered all the hatches by cutting pieces of material used to cover windshields and putting these between the screen and the glass. Top Right - The glove box by the Navigator's seat cried out for a shelf. The left side of the shelf has the label maker and a packet of tape colors. Clear plastic bins organize the contents. The 12 volt power socket was taken out of the wall and combination USB, 12 volt socket was inserted into it and stays in the glove box. The USB power has a resident power cord to charge the phones. When the exterior mounted searchlight failed, it was replaced with a powerful, handheld light with a rechargeable battery from Stanley
Photos Below, Top Left - Ranger Tug put a lot of hatches in the roof. All the light creates an open and airy feeling but it also creates heat and glare. We have covered all the hatches by cutting pieces of material used to cover windshields and putting these between the screen and the glass. Top Right - The glove box by the Navigator's seat cried out for a shelf. The left side of the shelf has the label maker and a packet of tape colors. Clear plastic bins organize the contents. The 12 volt power socket was taken out of the wall and combination USB, 12 volt socket was inserted into it and stays in the glove box. The USB power has a resident power cord to charge the phones. When the exterior mounted searchlight failed, it was replaced with a powerful, handheld light with a rechargeable battery from Stanley

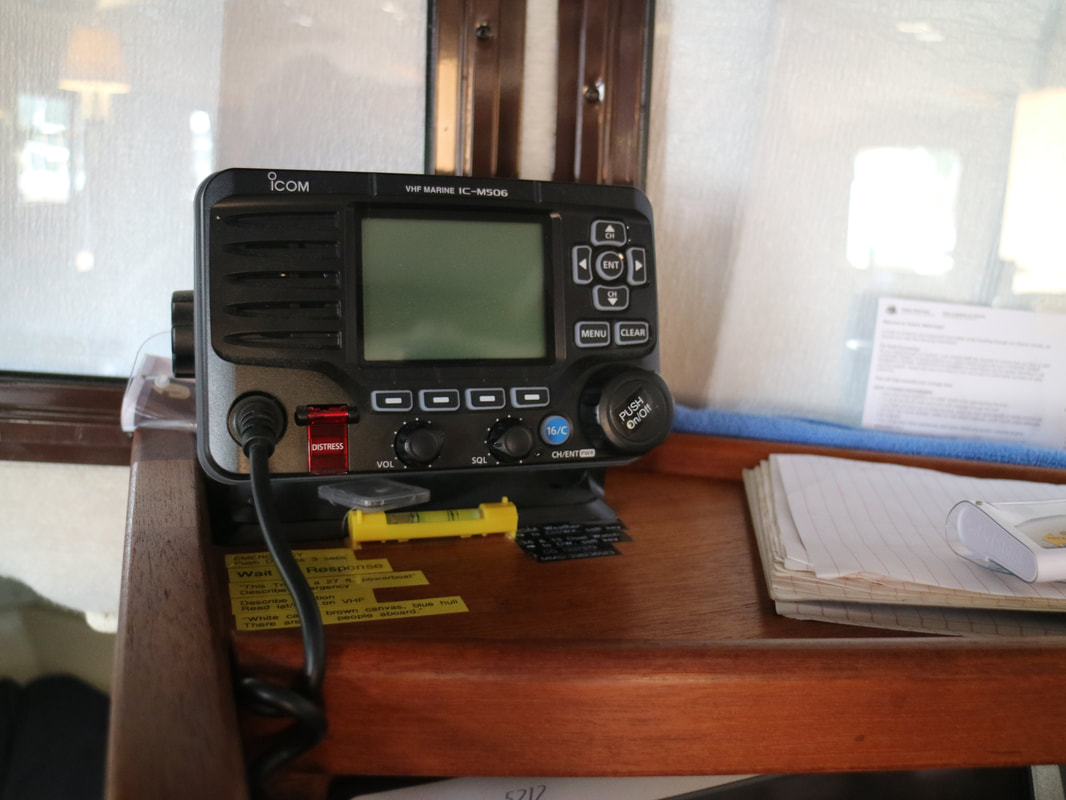

Photos Above: Left - When the Garmin VHF radio failed, it was replaced with an ICOM model that receives Automatic Identification System (AIS) signals from other boats and displays them on the Garmin chart plotter. The radio was moved for ease of use and ability to read the screen. The yellow labels under the radio are instructions to anyone on the boat on how to use the emergency broadcast features. Right - This photo shows several additions that were made at the Navigator's Chair. An iPad running the applications Navionics or Aquamaps is used while cruising for the Navigator's use. A drink holder was added to the left side of the counter. In upper right side is the Sirius XM radio head that is connected to the Fusion Radio sound system. The satellite radio head is moved to other places and vehicles that we use. In the high heat areas, an insulated windshield covering is placed between the glass and the canvas cover and it will lower the glass temperature by 10 degrees.
Battery Monitor
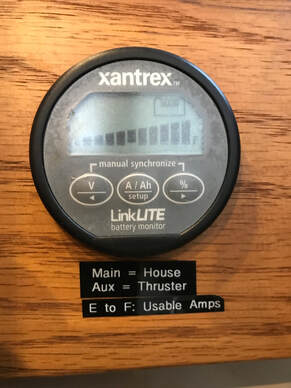
When you live in the world of 12 volts, paying attention to the batteries is essential. Most boaters will use the voltage level to monitor the batteries. 12.8 volts is fully charged and anything less than 11 volts and the battery is nearly dead. Everything in-between is only a rough guide of the battery's status. Using a battery monitor takes the guess work out of the amount of usable power in the batteries. The monitor measures the amperes used. The amount of available amperes is inputed manually once. The monitor subtracts the amps used and converts the result to a percentage of available power. Installing a monitor requires moving all the ground cables from the battery to one common shunt that the monitor uses. This often involves making several new battery cables. The work is straight forward but does require special tools and basic wiring knowledge. On a scale of 1 to 5 of difficulty with 5 being the highest, this is about a 3.5.
This is the second Xantrex model that I have used. For more information about this, CLICK HERE.
The Floor Area Before the V-Berth
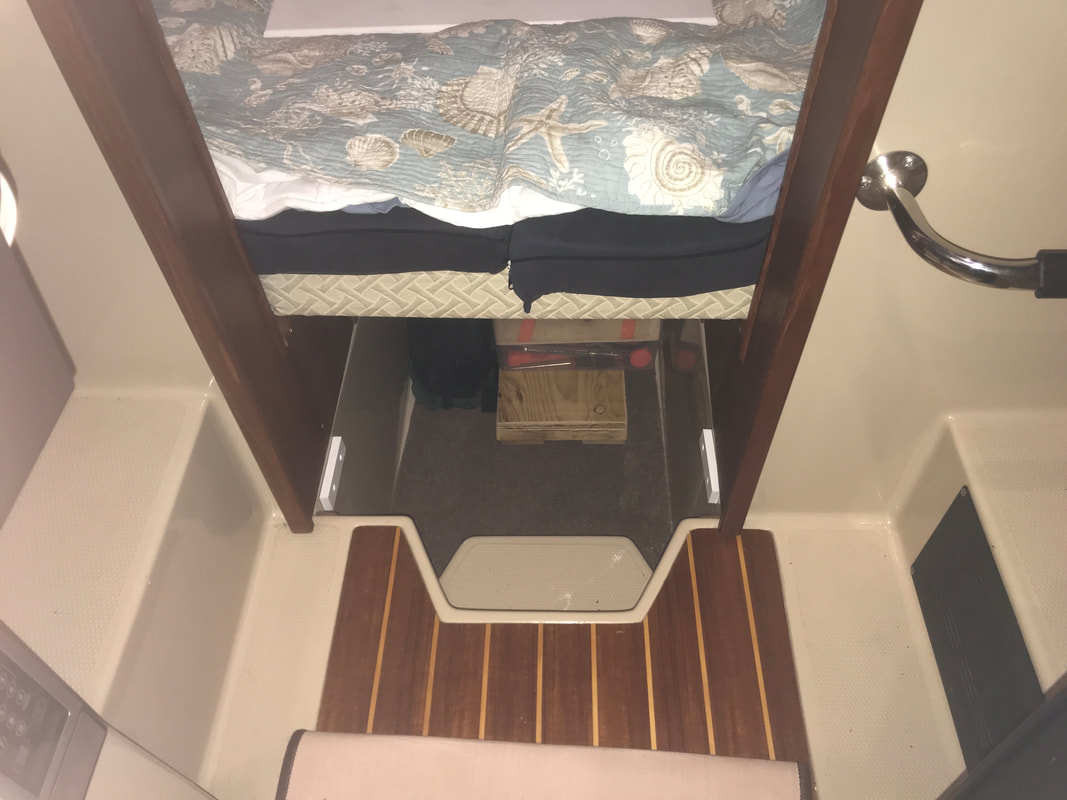
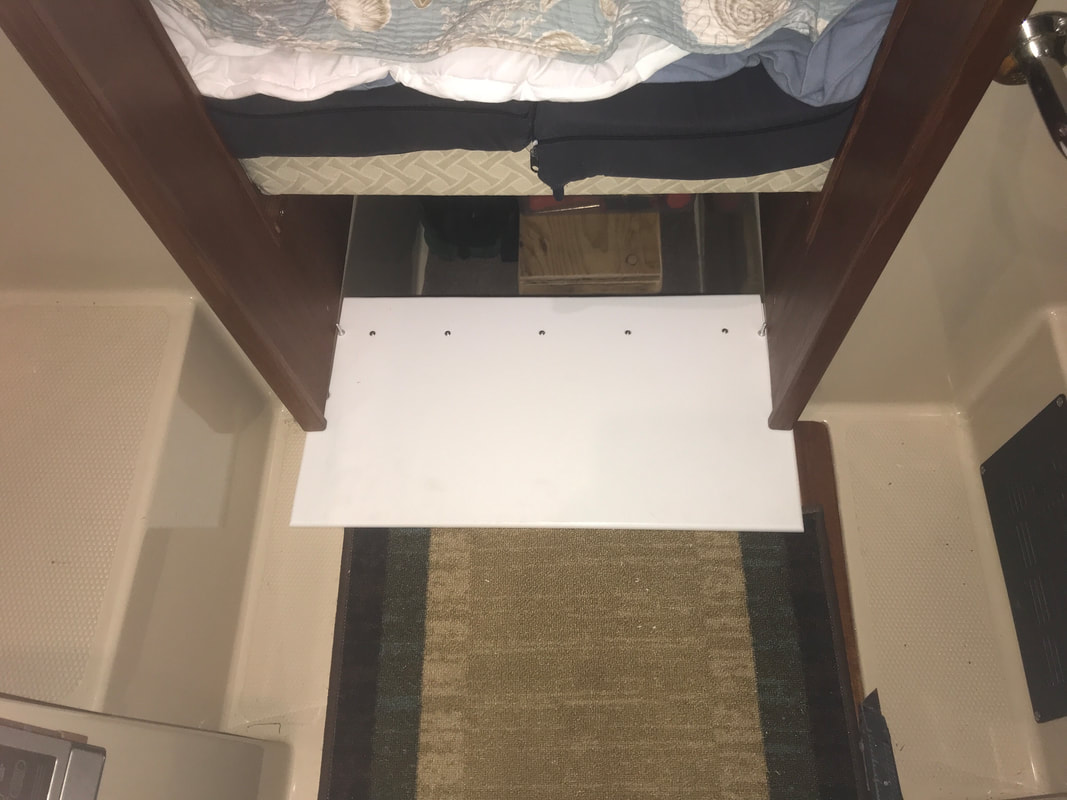
The area in front of the helm station can either be a sitting area with couches facing each other or a V-Berth that is about the same square footage as a queen size bed. As a sitting area, there is a step and a half down to the floor and that step starts between the helm seat and the navigator's seat. We always use the area as a V-berth and have never used it as a sitting area. I covered the space where the step is with starboard. The covering is easily removed to easily get the tools, supplies, first aid kit and manuals that are are stored there. Covering the step made the entry and exit to the V-berth easier and safer. The covering has the second function of holding down the carpet runner. Our dog, Maggie, stays in the V-berth when the boat is underway and the covering works for her also. The photo on the left is before the covering. The photo on the right is the covering.
The area in front of the helm station can either be a sitting area with couches facing each other or a V-Berth that is about the same square footage as a queen size bed. As a sitting area, there is a step and a half down to the floor and that step starts between the helm seat and the navigator's seat. We always use the area as a V-berth and have never used it as a sitting area. I covered the space where the step is with starboard. The covering is easily removed to easily get the tools, supplies, first aid kit and manuals that are are stored there. Covering the step made the entry and exit to the V-berth easier and safer. The covering has the second function of holding down the carpet runner. Our dog, Maggie, stays in the V-berth when the boat is underway and the covering works for her also. The photo on the left is before the covering. The photo on the right is the covering.
The "Office"
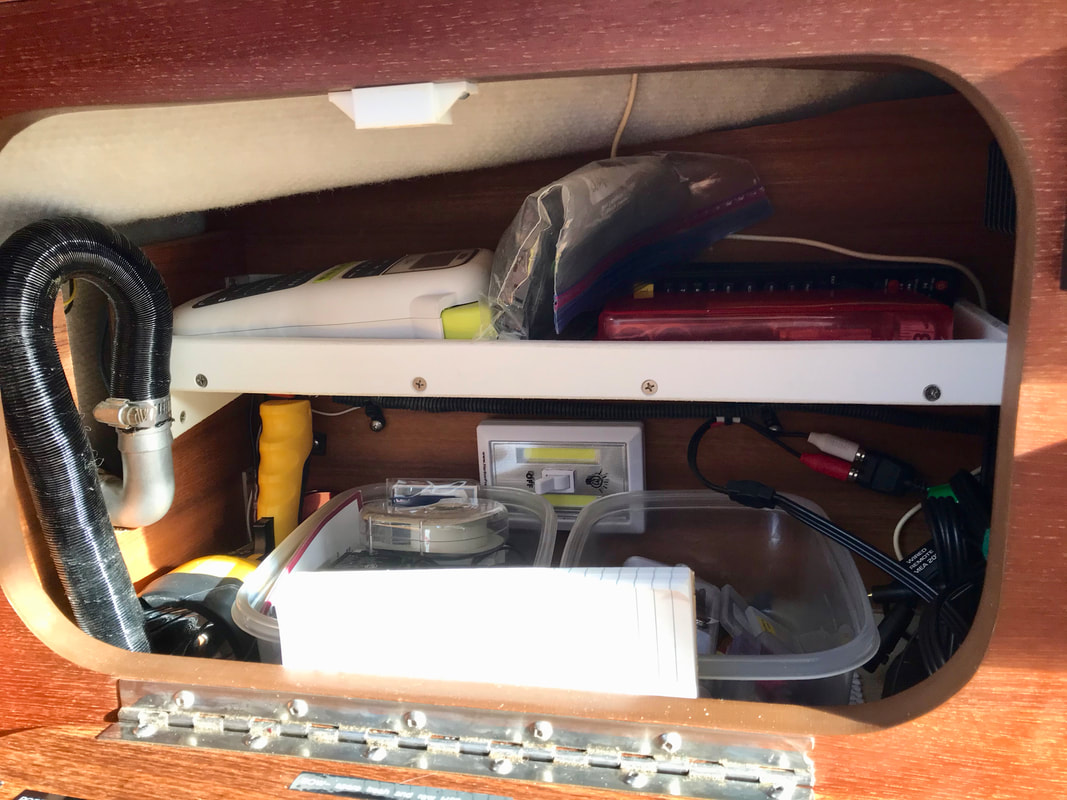
This model of the Ranger 27 included a small desk that folded out, a light and a removable chair. This was located on the starboard side, next to the door to the cockpit and was part of the quarter berth. This was covered with a wood lid on a hinge and the canvas was used to provide privacy and to hide all of it. I took off the lid immediately to provide better access.
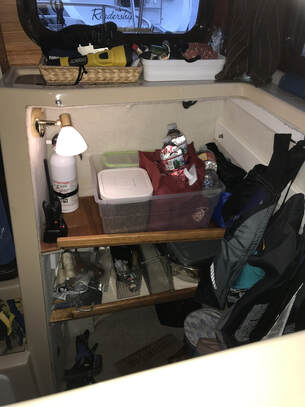
After three years, we never used the desk or the chair as designed. We thought we could make better use of this space. The galley did not have enough of the kind of space that we needed. The folding desk was trimmed into a permanent shelf with a fiddle. Another shelf was added that also had a fiddle. The light was moved up and outward to better illuminate the space and make room for the fire extinguisher and the handheld VHF radio and its charger. I wanted the emergency equipment in a space that is easily accessible. The portable VHF serves as a backup radio, one to take if the boat starts to go down and is our way for the dinghy to talk to the tug. All of this is next to the Personal Floatation Devices that we use.
This model of the Ranger 27 included a small desk that folded out, a light and a removable chair. This was located on the starboard side, next to the door to the cockpit and was part of the quarter berth. This was covered with a wood lid on a hinge and the canvas was used to provide privacy and to hide all of it. I took off the lid immediately to provide better access.
After three years, we never used the desk or the chair as designed. We thought we could make better use of this space. The galley did not have enough of the kind of space that we needed. The folding desk was trimmed into a permanent shelf with a fiddle. Another shelf was added that also had a fiddle. The light was moved up and outward to better illuminate the space and make room for the fire extinguisher and the handheld VHF radio and its charger. I wanted the emergency equipment in a space that is easily accessible. The portable VHF serves as a backup radio, one to take if the boat starts to go down and is our way for the dinghy to talk to the tug. All of this is next to the Personal Floatation Devices that we use.
Adding a Shelf to a Cabinet
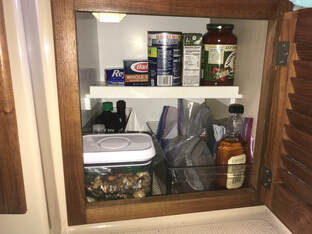
The cabinets under the counter have large spaces behind the doors. These cry out for improvement to make better use of the space. Laurie wanted to use the space for a few tall items and more bins that she uses to organize the contents inside the cabinets. The solution was adding a shelf that was open on the front 1/3. The shelf is made of 3/8" white starboard and a fiddle was added to keep everything on the shelf.
All of the cabinets have battery powered LED lights.
Moving The Compass and Using It For Another Purpose
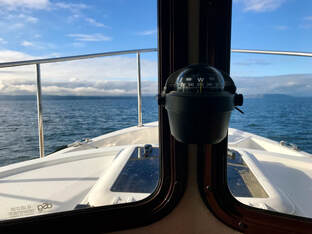
The factory had to put the compass on the top of the helm for visibility. No complaints there. I move the VHF radio there because I wanted it more visible. Again, the factory could not move the radio because for smaller people, it could interfere with seeing out the windshield. I located the compass to between the two center windows. It is visible and useful there. The added benefit was the compass is more accurate because it is free of the electrical field interference caused by all the electrical power that comes into the cabinet. I also found the floating bubble feature shows the side-to-side trim of the boat. This is valuable in using the trim tabs which make the boat's ride more comfortable and more fuel efficient. So, the compass is like a big bubble level.
The factory had to put the compass on the top of the helm for visibility. No complaints there. I move the VHF radio there because I wanted it more visible. Again, the factory could not move the radio because for smaller people, it could interfere with seeing out the windshield. I located the compass to between the two center windows. It is visible and useful there. The added benefit was the compass is more accurate because it is free of the electrical field interference caused by all the electrical power that comes into the cabinet. I also found the floating bubble feature shows the side-to-side trim of the boat. This is valuable in using the trim tabs which make the boat's ride more comfortable and more fuel efficient. So, the compass is like a big bubble level.
First Aid Supplies
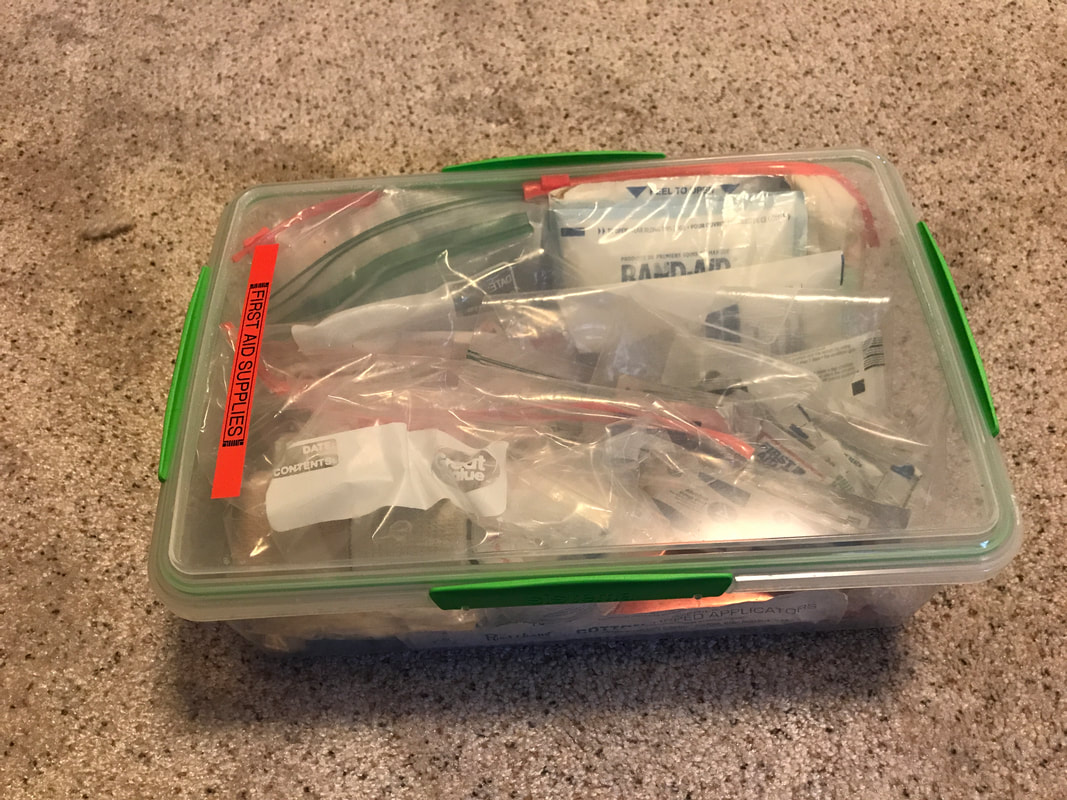
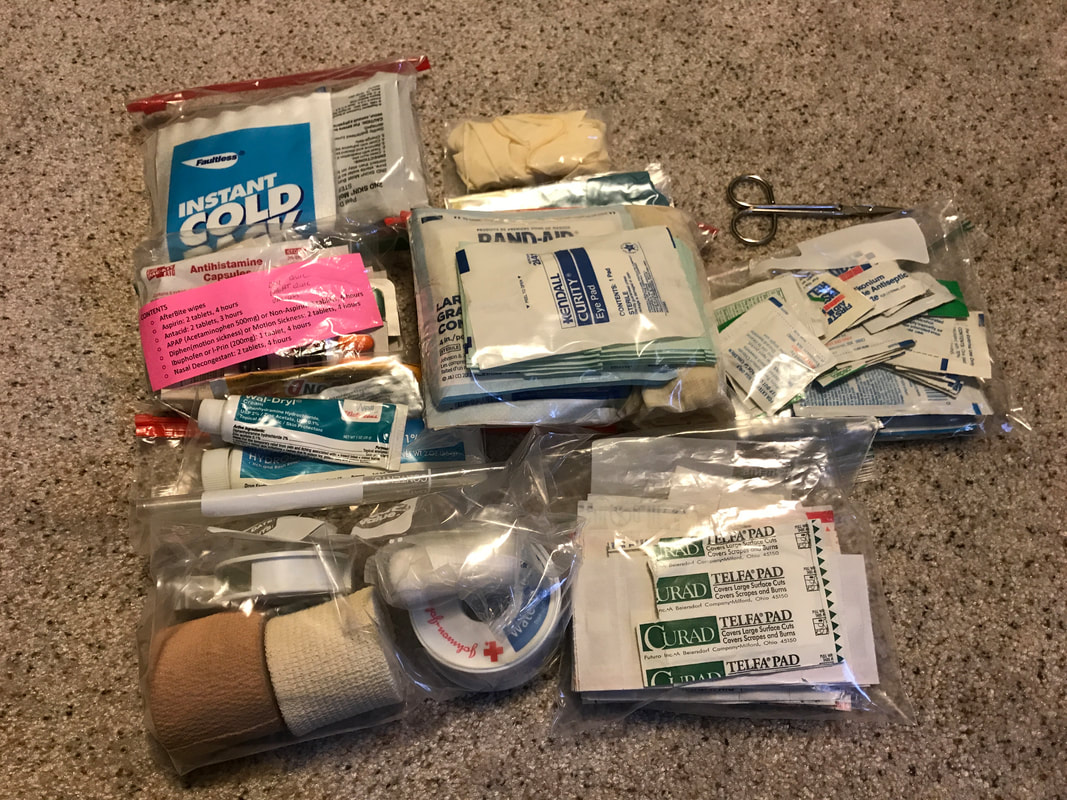
I built the first aid kit from the supplies that I wanted. From my background as a Park Ranger and trained as a Emergency Medical Technician there some supplies I feel more passionate about. My career in policing also taught me lessons about what works for me. I use a clear bin with a good lid and a minimum of labels or text. The contents are organized in clear plastic bags. When the emergency happens it is hard to read anything. There are small bags of bandaids, 4 by 4 gauss pads, cleaning pads, common medications, tape and wraps and ice packs. BoatUS is a great organization and here is their recommendation of the basic contents of a first aid kit on a boat: CLICK HERE.
I built the first aid kit from the supplies that I wanted. From my background as a Park Ranger and trained as a Emergency Medical Technician there some supplies I feel more passionate about. My career in policing also taught me lessons about what works for me. I use a clear bin with a good lid and a minimum of labels or text. The contents are organized in clear plastic bags. When the emergency happens it is hard to read anything. There are small bags of bandaids, 4 by 4 gauss pads, cleaning pads, common medications, tape and wraps and ice packs. BoatUS is a great organization and here is their recommendation of the basic contents of a first aid kit on a boat: CLICK HERE.
Tools and Supplies For Repairs
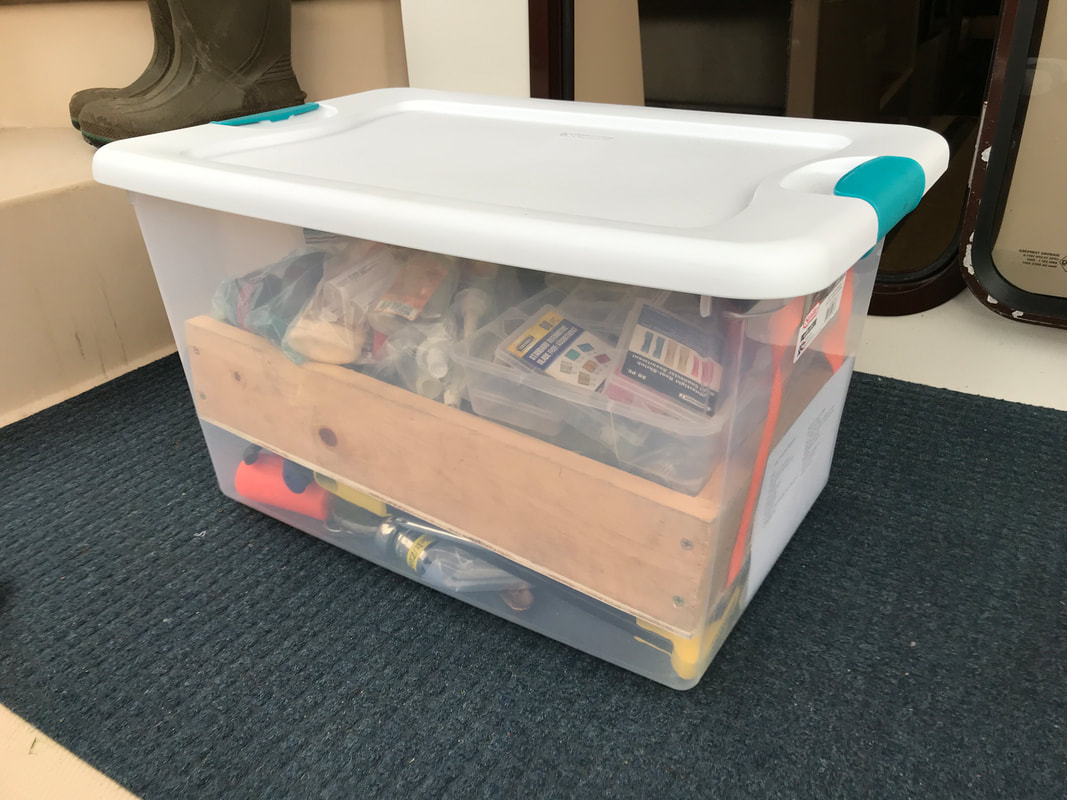
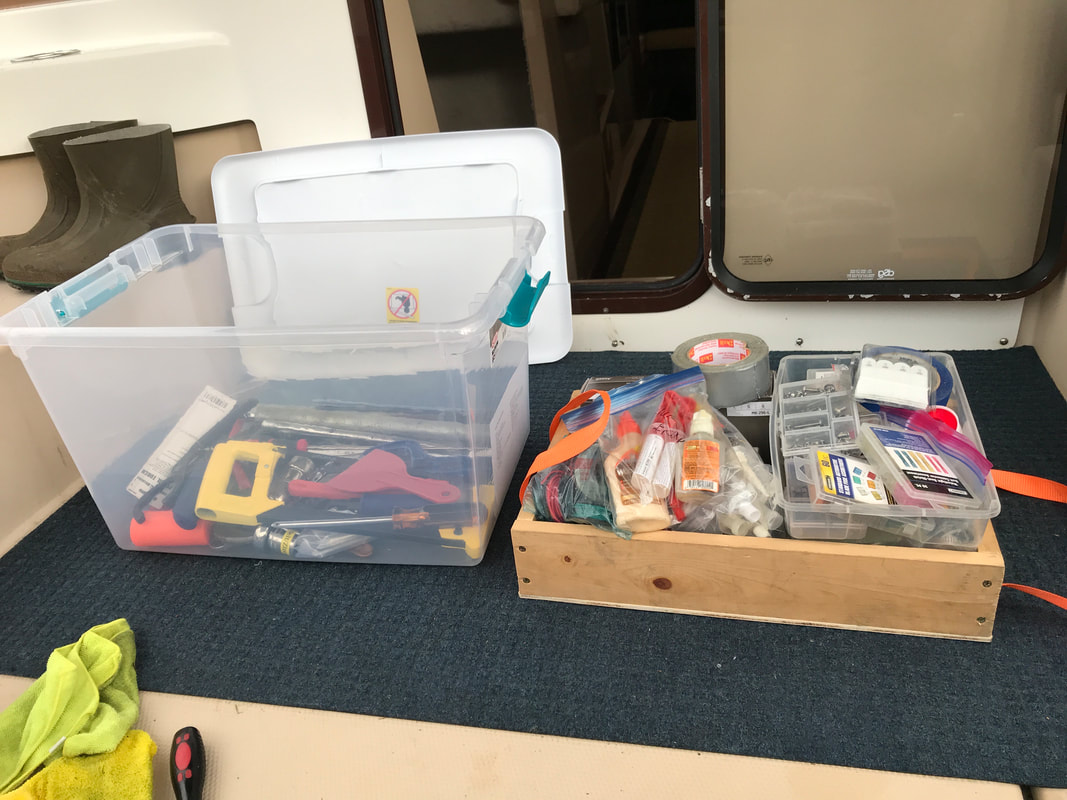
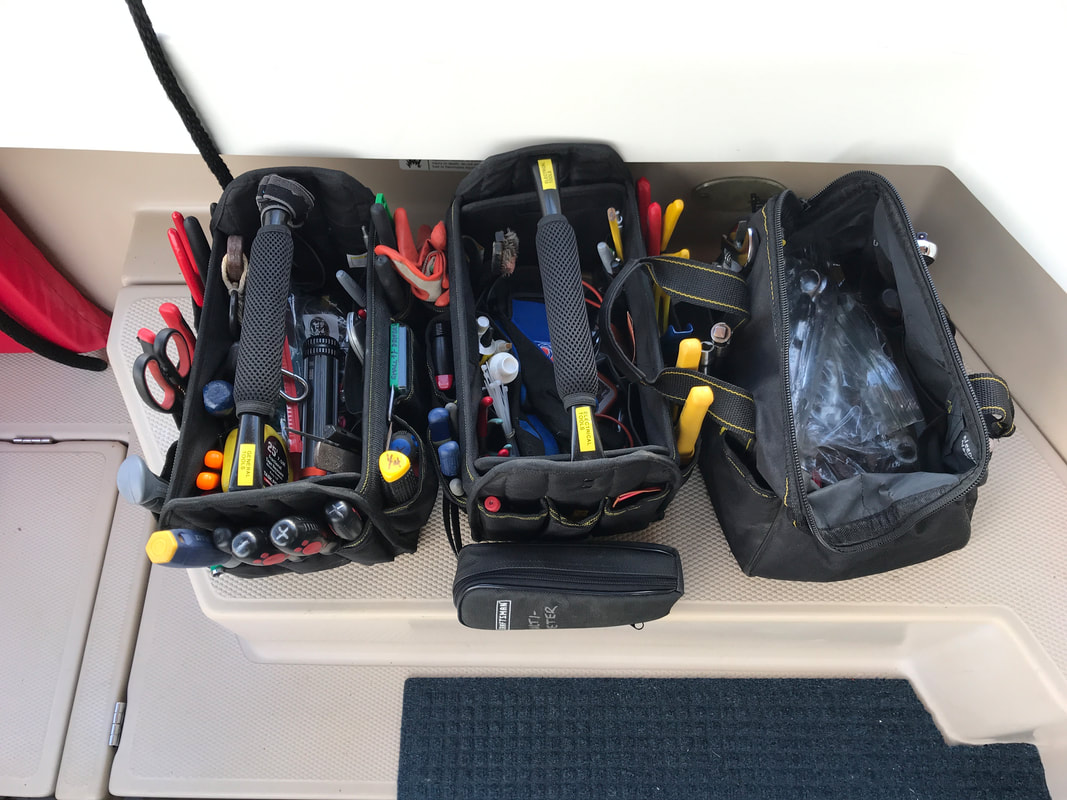
Because I do 99% of the repairs and maintenance, I carry a quantity of tools and repair materials. Tool storage and organization is evolving. I have done a variety of boxes and containers. For tools, I use soft-sided bags and two are semi-rigid. All of them were found at Harbor Freight. Most of the tools are carried in three bags. From the photo below, right: one is for General Use Tools, another is Electrical Tools, and the third is Mechanical Tools.
Photo below, left- Large and heavy tools go into a plastic bin. Photo below, center - I built a tray for the bin that lifts out and holds all the repair supplies likes screws, tape, adhesives, fuses, electrical connectors sandpaper, etc. This bin is heavy and is rarely moved. It is stored on the floor of the V-berth. Out of the way but accessible. Also, a portable work service made of 2 by 4's that makes a square foot surface was made. Cleaning supplies and gelcoat maintenance has a separate storage.
The Exterior and Cockpit
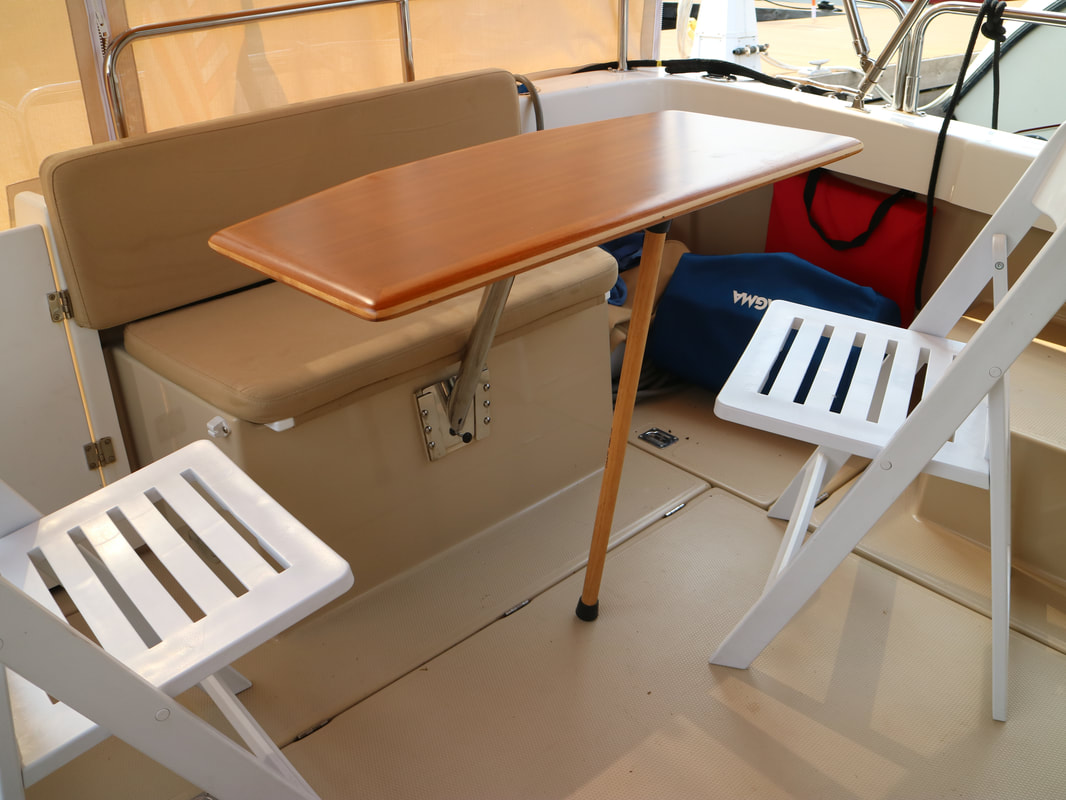
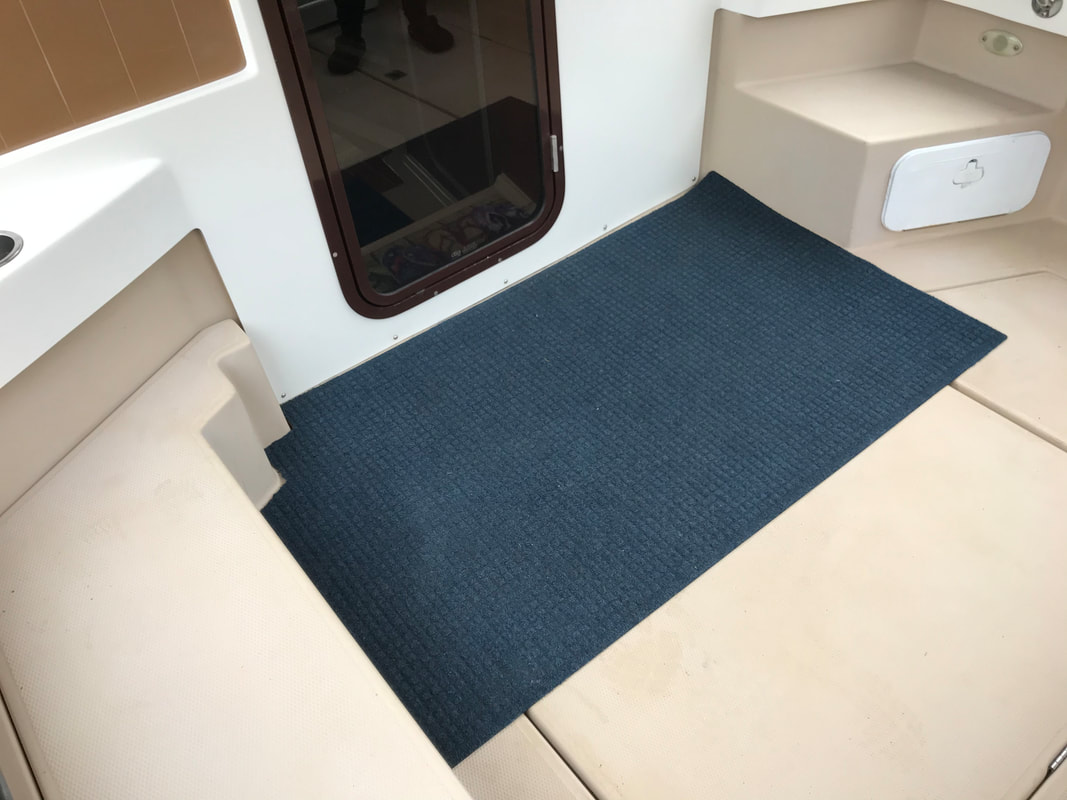
Photo Below, Top Left - The cockpit table mount had too much flex for my taste. The added leg is held in place by friction of the rubber ends and a bit of downward tension. The two resin folding chairs (available at Amazon.com) fold up nicely and store standing up on the side of the cockpit. These are durable and can withstand being stored outside. The red square in this photo is a throwable cushion/floatation that is held on the wall with two snaps for ease of use. Photo Below, Top Right - This mat is rubber and obtained from Amazon.com. It was cut with a utility knife to fit. It also serves as a sound buffer from the engine.
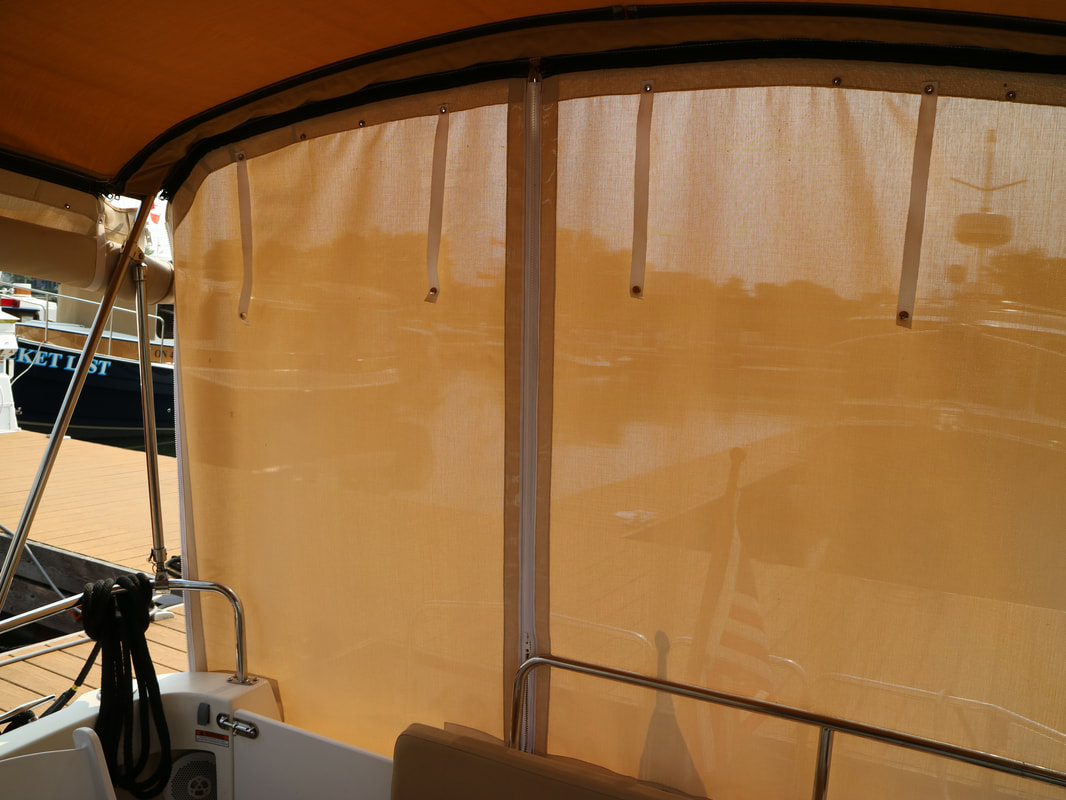
Photos below, bottom row - The plastic side curtains were damaged and replaced with a tight weave material by SailRite. I gave the plastic side curtains to Leta's Top Shop in Arlington, WA and they used those as a template. The weave is so tight that it keeps out 80% of the sunlight, repels 80% of the rain, and blocks 90% of the mosquitos. It is compact and can stay rolled up on the canvas cockpit cover (see the photo) or easily stowed in a large duffle bag. Looking out, you can see people. Looking in, it is private.
Photo Below, Top Left - The cockpit table mount had too much flex for my taste. The added leg is held in place by friction of the rubber ends and a bit of downward tension. The two resin folding chairs (available at Amazon.com) fold up nicely and store standing up on the side of the cockpit. These are durable and can withstand being stored outside. The red square in this photo is a throwable cushion/floatation that is held on the wall with two snaps for ease of use. Photo Below, Top Right - This mat is rubber and obtained from Amazon.com. It was cut with a utility knife to fit. It also serves as a sound buffer from the engine.
Photos below, bottom row - The plastic side curtains were damaged and replaced with a tight weave material by SailRite. I gave the plastic side curtains to Leta's Top Shop in Arlington, WA and they used those as a template. The weave is so tight that it keeps out 80% of the sunlight, repels 80% of the rain, and blocks 90% of the mosquitos. It is compact and can stay rolled up on the canvas cockpit cover (see the photo) or easily stowed in a large duffle bag. Looking out, you can see people. Looking in, it is private.
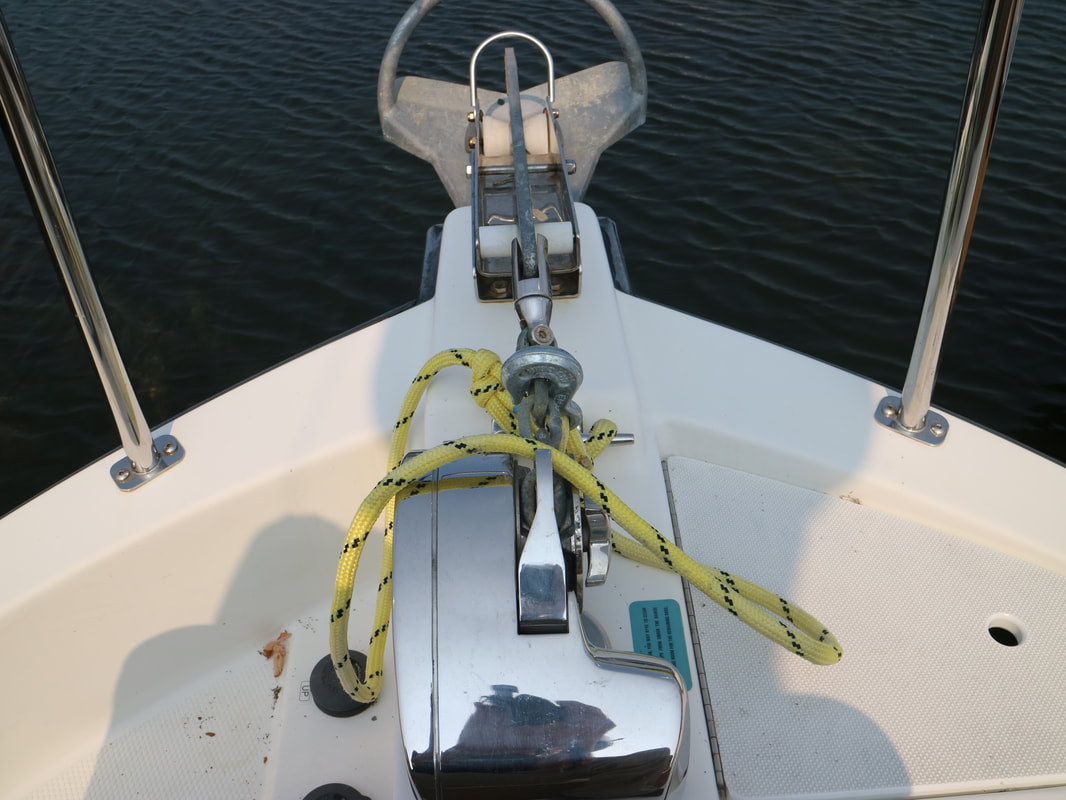
Photos below, Left - Two folding bikes fit nicely on the roof and under the solar panel. We have used the same Dahon Mariner bikes for many years and cycled through many towns and areas in the United States and Canada. We call them 5 mile bikes and are used for exploring and provisioning. Right - The anchor system was modified to use a 10lb Rocna that has earned our trust and confidence. It is attached to 50 feet of chain with a swivel and 150 feet of twisted nylon. The yellow line in the photo is an anchor snubber that is used when only the chain is deployed. It is six feet of braided nylon with a chain hook on one end. The snubber takes the tension off of the windlass, stops the noise of the chain on the roller and is a shock absorber.

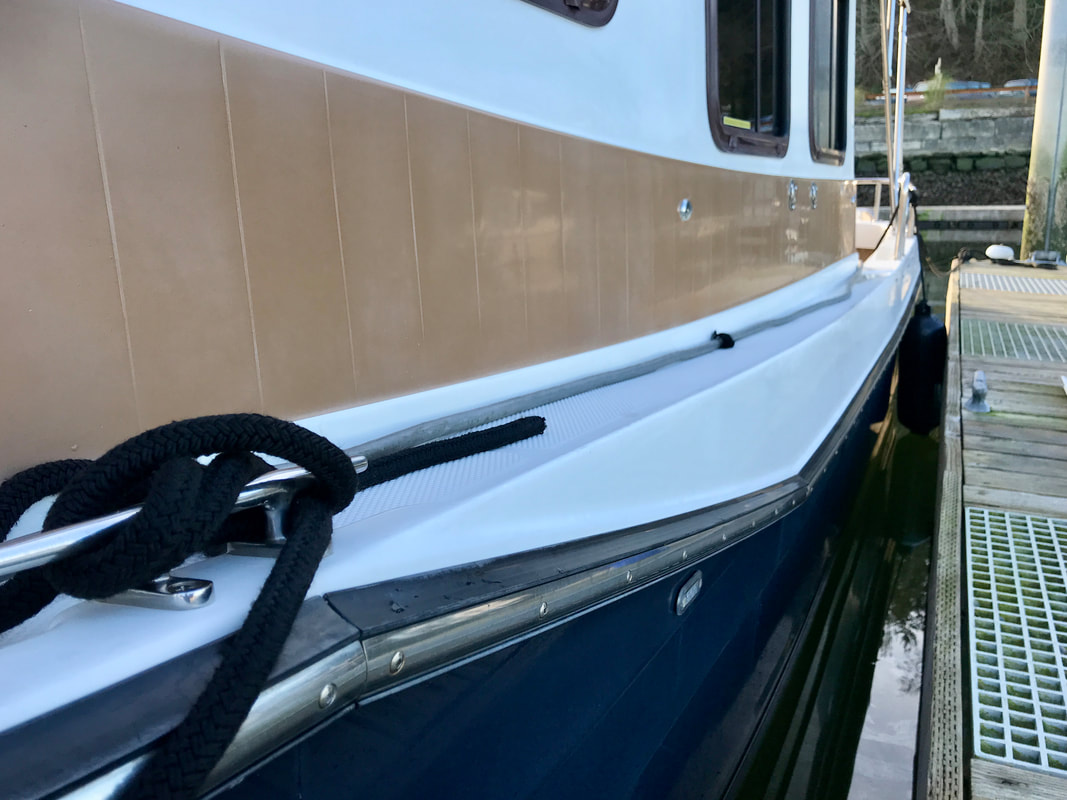
The Toe Rail Extensions: upgrading to a current feature
The toe rail is used as the main method to move on the outside of the boat from the stern to bow. The other method is staying inside and using the hatch in the V-berth which is great for younger and skinner people who are more flexible. Several years after this 2012 model was built, the factory added an extension to the width of the tow rail for several models of boats. Made of extruded plastic by the factory, it adds another 1.5 inches to the width and has a slightly upturned edge that creates the feel of being safer. I contacted the factory and learned that the parts for each side of the boat can be ordered. Though we rarely walk to the bow, mostly when at anchor, I wanted the safety that the extension provided. Each extension took about 90 minutes to install. Holes are drilled and countersinked to prevent the gelcoat from cracking. 3M 4000 was applied to each hole. 3/4 inch, number 8 stainless screws did the attachment. The photo on the left is before the extension was added. The photo on the right is afterwards.
The toe rail is used as the main method to move on the outside of the boat from the stern to bow. The other method is staying inside and using the hatch in the V-berth which is great for younger and skinner people who are more flexible. Several years after this 2012 model was built, the factory added an extension to the width of the tow rail for several models of boats. Made of extruded plastic by the factory, it adds another 1.5 inches to the width and has a slightly upturned edge that creates the feel of being safer. I contacted the factory and learned that the parts for each side of the boat can be ordered. Though we rarely walk to the bow, mostly when at anchor, I wanted the safety that the extension provided. Each extension took about 90 minutes to install. Holes are drilled and countersinked to prevent the gelcoat from cracking. 3M 4000 was applied to each hole. 3/4 inch, number 8 stainless screws did the attachment. The photo on the left is before the extension was added. The photo on the right is afterwards.

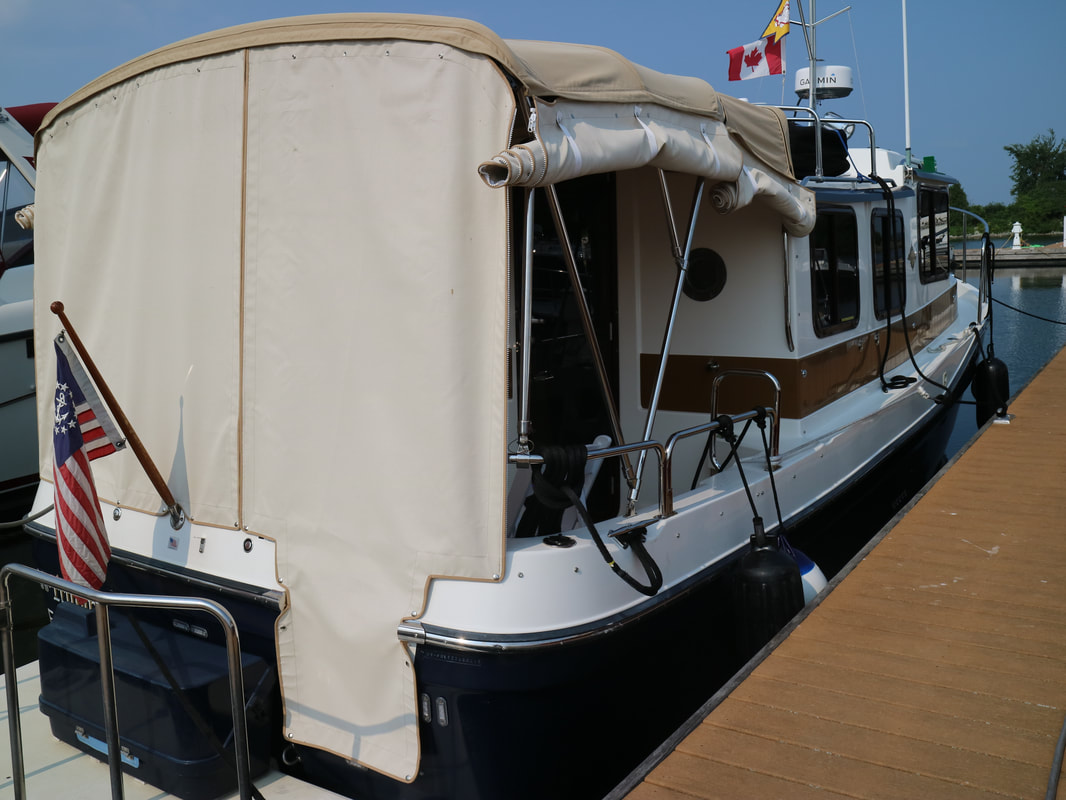
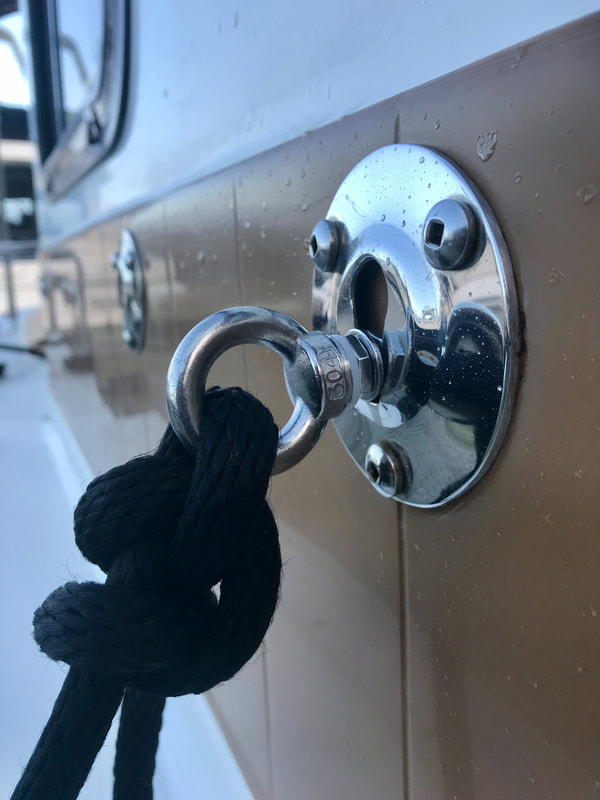
Mid-Cabin Fender: Adding the "5th Fender"
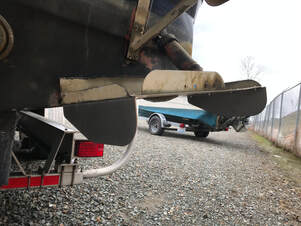
When the wind is up and the boat is pinned against the dock, I wanted a way to hang a fender in the middle of the boat that would provide additional protection with the bow and stern fenders. I toyed with the idea of adding a folding cleat that would be attached to the outside of the cabin and worked out a way to have backing plates that would be behind the panelling. This would useful for a spring line. I found that what I really wanted was a way to hang a fender without using the grab rails on the roof. I considered just using the step to hang the fender which would work fine but required putting the step on and then stowing it. I do not trust that the step can securely be kept on the toe rail without bouncing off when the sea conditions were really active. Also, I did not like the safety issue of having to negotiate the step when going forward was required. A posting on the owner's forum was the idea of using the one of the wall mounts for the step and mount a ring to it. I order the 3/4" stainless lifting ring with the metric size 8 stud from Amazon. My Ace Hardware store had the thin nuts and washers. Blue thread blocker keeps the nut from loosening. The fender is easily and quickly attached and removed and works on both sides of the boat. This 5th fender is a good addition to the two bow and two stern fenders that are kept in their places.
When the wind is up and the boat is pinned against the dock, I wanted a way to hang a fender in the middle of the boat that would provide additional protection with the bow and stern fenders. I toyed with the idea of adding a folding cleat that would be attached to the outside of the cabin and worked out a way to have backing plates that would be behind the panelling. This would useful for a spring line. I found that what I really wanted was a way to hang a fender without using the grab rails on the roof. I considered just using the step to hang the fender which would work fine but required putting the step on and then stowing it. I do not trust that the step can securely be kept on the toe rail without bouncing off when the sea conditions were really active. Also, I did not like the safety issue of having to negotiate the step when going forward was required. A posting on the owner's forum was the idea of using the one of the wall mounts for the step and mount a ring to it. I order the 3/4" stainless lifting ring with the metric size 8 stud from Amazon. My Ace Hardware store had the thin nuts and washers. Blue thread blocker keeps the nut from loosening. The fender is easily and quickly attached and removed and works on both sides of the boat. This 5th fender is a good addition to the two bow and two stern fenders that are kept in their places.

Multi-Purpose Line: Anchor Bridle, Mooring Ball Bridle and Towing Bridle
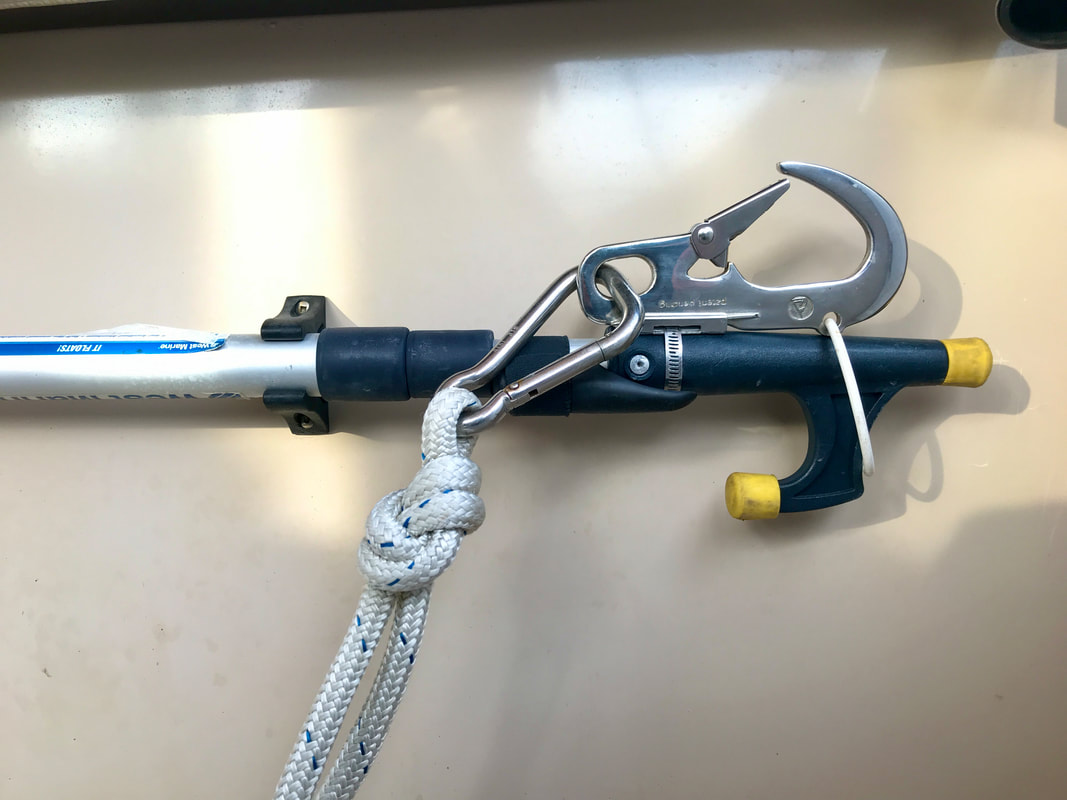
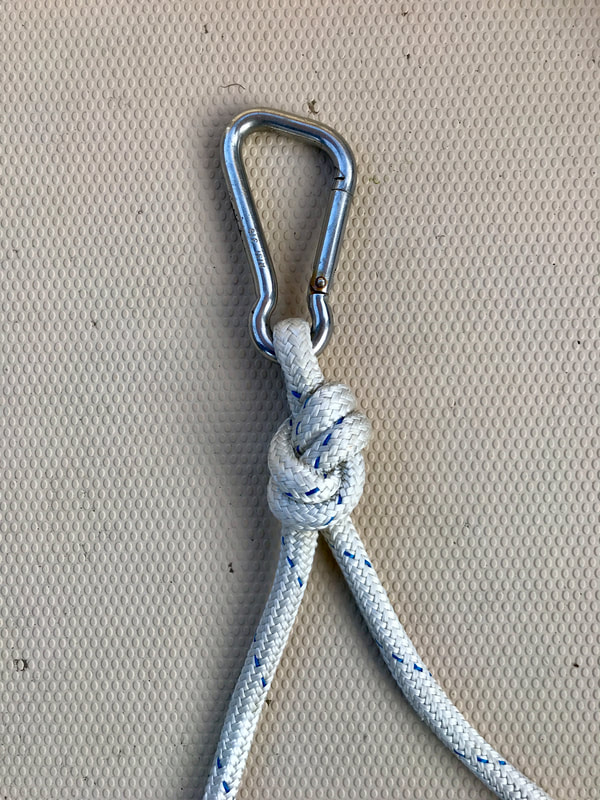
This is a 5/8" double braided line and is 28 feet long with a fixed loop in the middle with a large spring loaded, stainless D-Ring. This line has three purposes. With a chain hook on the D-ring, it becomes an anchor bridle. Photo below, left. An anchor bridle serves as a shock absorber and takes the stress off of the windlass when there is only chain deployed and the wind is up at anchor. Hook a link on the chain and pay out the chain until the chain hook is just below the water's surface. Run each half of the line through the deck chocks on each side and secure to a cleat. I use an anchor bridle every time at anchor when the depth requires only the chain portion of the anchor rode.
With the Grab 'N Go Mooring Hook (CLICK HERE for the Amazon price) attached to the boat hook and the D-ring, this line becomes a mooring ball bridle. Photo below, center. This tool makes grabbing a mooring ball in an anchorage very easy and is done safely when done from the cockpit. After the Grab 'N Go snaps onto the mooring ring, it is pulled close to the cockpit side and the hook is replaced by the D-ring. Then we walk the toe rail to the bow and secure the line in the same way as the anchor bridle. I trust the large D-ring over the mooring hook for overnight stays and when the wind is up.
Use this line with only the D-ring to become a towing bridle. Photo below, right. Attach each half of the line to the stern cleats on each side of the boat with the D-ring going just past the swim step. Put a loop in the towed vessel's bow line and snap it into the D-ring. Your line will not foul your prop, the towing load is centered on your boat and shared with both stern cleats, and the bow line is easy removed when needed.

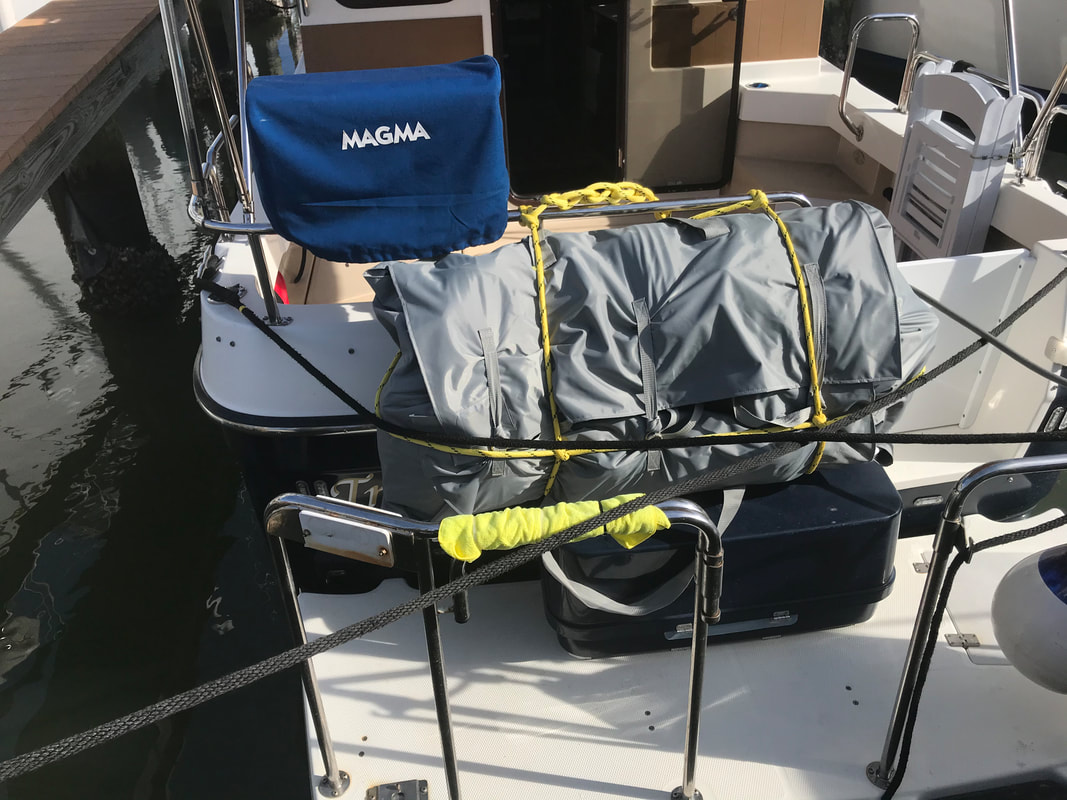
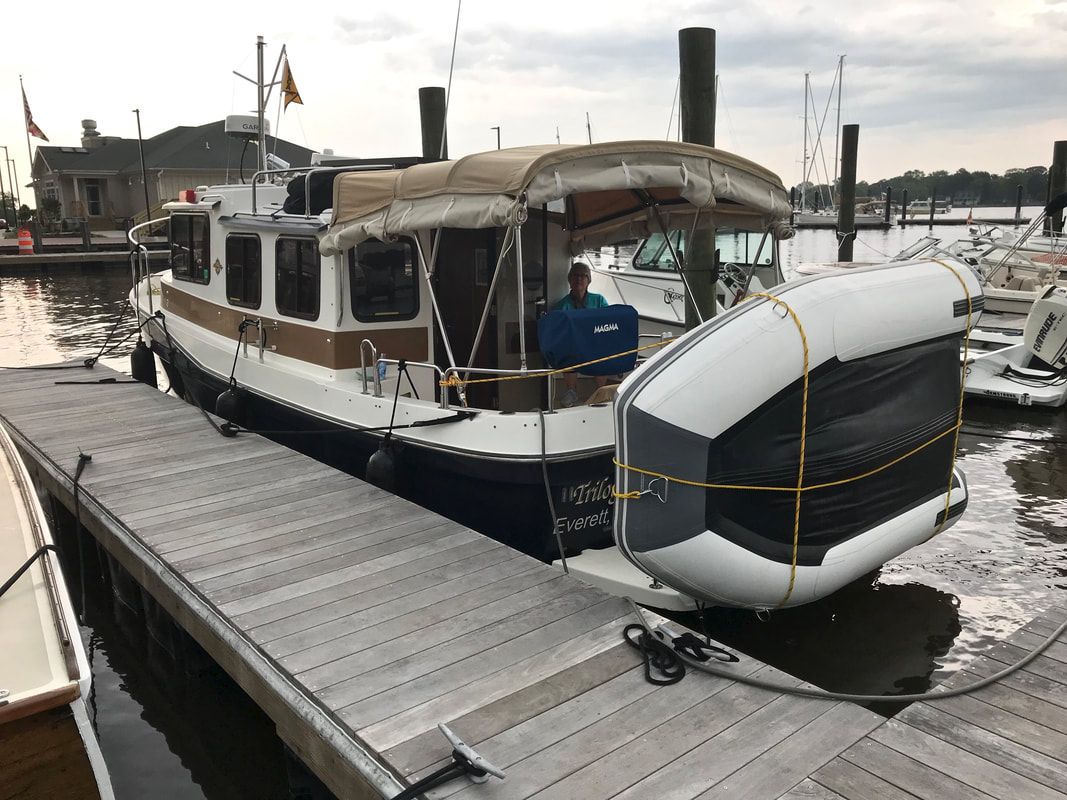
Dingy: Portable, Storable, and Easy To Use
There are many makes and models of dinghies to choose from. Dinghies are like opinions, everyone loves theirs. We have had the rigid hull inflatable, the roll-up, and kayaks. Each had its strengths and weaknesses. Each worked well for the circumstances at the time and a specific objective. Do you really need a dinghy? Or, maybe kayaks are the better. The answer is probably NOT if you answer no to all of these questions:
The length of this model is about the beam of the tug. When the dinghy is hung on the transom, it does not interfere with docking. It rides nicely against the rails on the swim step using rope and straps and without the need of davits. When deflated, it fits nicely into two bags: one is for the boat, the other is for the seats, floor, pump and lines. The two bags fit in the under dinette berth, on top of the propane locker on the swim step or on the roof under the solar panel. Assembly and inflation is easy and takes about 20 minutes. A feature that I like is the oversize 19" diameter tubes that creates over 1,000 pounds of capacity and therefore is taller in the water than most other dinghies. With an air keel and the wood floor makes it easier to row than some dinghies. Weight is also a factor on smaller boats because it affects how the boat sits on the water and speed/fuel efficiency performance.
There are many makes and models of dinghies to choose from. Dinghies are like opinions, everyone loves theirs. We have had the rigid hull inflatable, the roll-up, and kayaks. Each had its strengths and weaknesses. Each worked well for the circumstances at the time and a specific objective. Do you really need a dinghy? Or, maybe kayaks are the better. The answer is probably NOT if you answer no to all of these questions:
- Do you cruise out of sight of land?
- Do you cruise with a dog?
- Do you provision while at anchor?
- Do you explore areas that are out-of-sight of your cruising boat?
The length of this model is about the beam of the tug. When the dinghy is hung on the transom, it does not interfere with docking. It rides nicely against the rails on the swim step using rope and straps and without the need of davits. When deflated, it fits nicely into two bags: one is for the boat, the other is for the seats, floor, pump and lines. The two bags fit in the under dinette berth, on top of the propane locker on the swim step or on the roof under the solar panel. Assembly and inflation is easy and takes about 20 minutes. A feature that I like is the oversize 19" diameter tubes that creates over 1,000 pounds of capacity and therefore is taller in the water than most other dinghies. With an air keel and the wood floor makes it easier to row than some dinghies. Weight is also a factor on smaller boats because it affects how the boat sits on the water and speed/fuel efficiency performance.


Better Performance From The Trim Tabs
The manufacturer of the trim tabs is Bennett Marine. As an accessory, they offer a "drop fin" (click here) that is an add-on and is bolted to the bottom of each trim tab. The drop fin channels water under the trim tab and makes the trim tab more effective. Why do this? With the dinghy on the transom or there is more weight in the cockpit, the boat does not ride level when the trim tabs are down to their maximum. This reduces the speed a bit and increases fuel consumption a bit. When I installed the drop fins, the trim tabs brought the bow down quicker because a steeper angle of the tabs was not required. With less angle, there is less drag. Without the added weight, the boat goes a tad faster and gets a bit more fuel economy.
The install was done when the boat is out of the water while I was changing anodes. Four holes are drilled on each end of the trim tab using the drop fin as a template. Use a cobalt drill because these bits are designed to drill through metal. Get stainless #8 machine screws (1/2" long) and locking nuts. The whole job took about 90 minutes.